Assets manager
AdonisJS makes use of Webpack Encore to compile and serve the frontend assets. Webpack Encore is a wrapper on top of Webpack to make it easier to work with the Webpack config.
AdonisJS is a backend framework and does not concern itself directly with the frontend build tools.
You are free NOT to use Webpack Encore and set up the frontend build tools yourself, and everything will still work.
Getting started
Creating a new AdonisJS application also prompts you to configure Webpack Encore. However, setting it up afterward is also relatively simple. Just run the following Ace command.
node ace configure encore
The following actions are performed to set up Webpack Encore:
- Install
@symfony/webpack-encorenpm package. - Create a default
webpack.config.jsfile. - Create
resources/js/app.jsandresources/css/app.cssfiles as the first entry point to your frontend application.
Compiling frontend assets
Once Encore has been configured, the pre-existing commands of AdonisJS will detect it and process your frontend assets as part of the following commands.
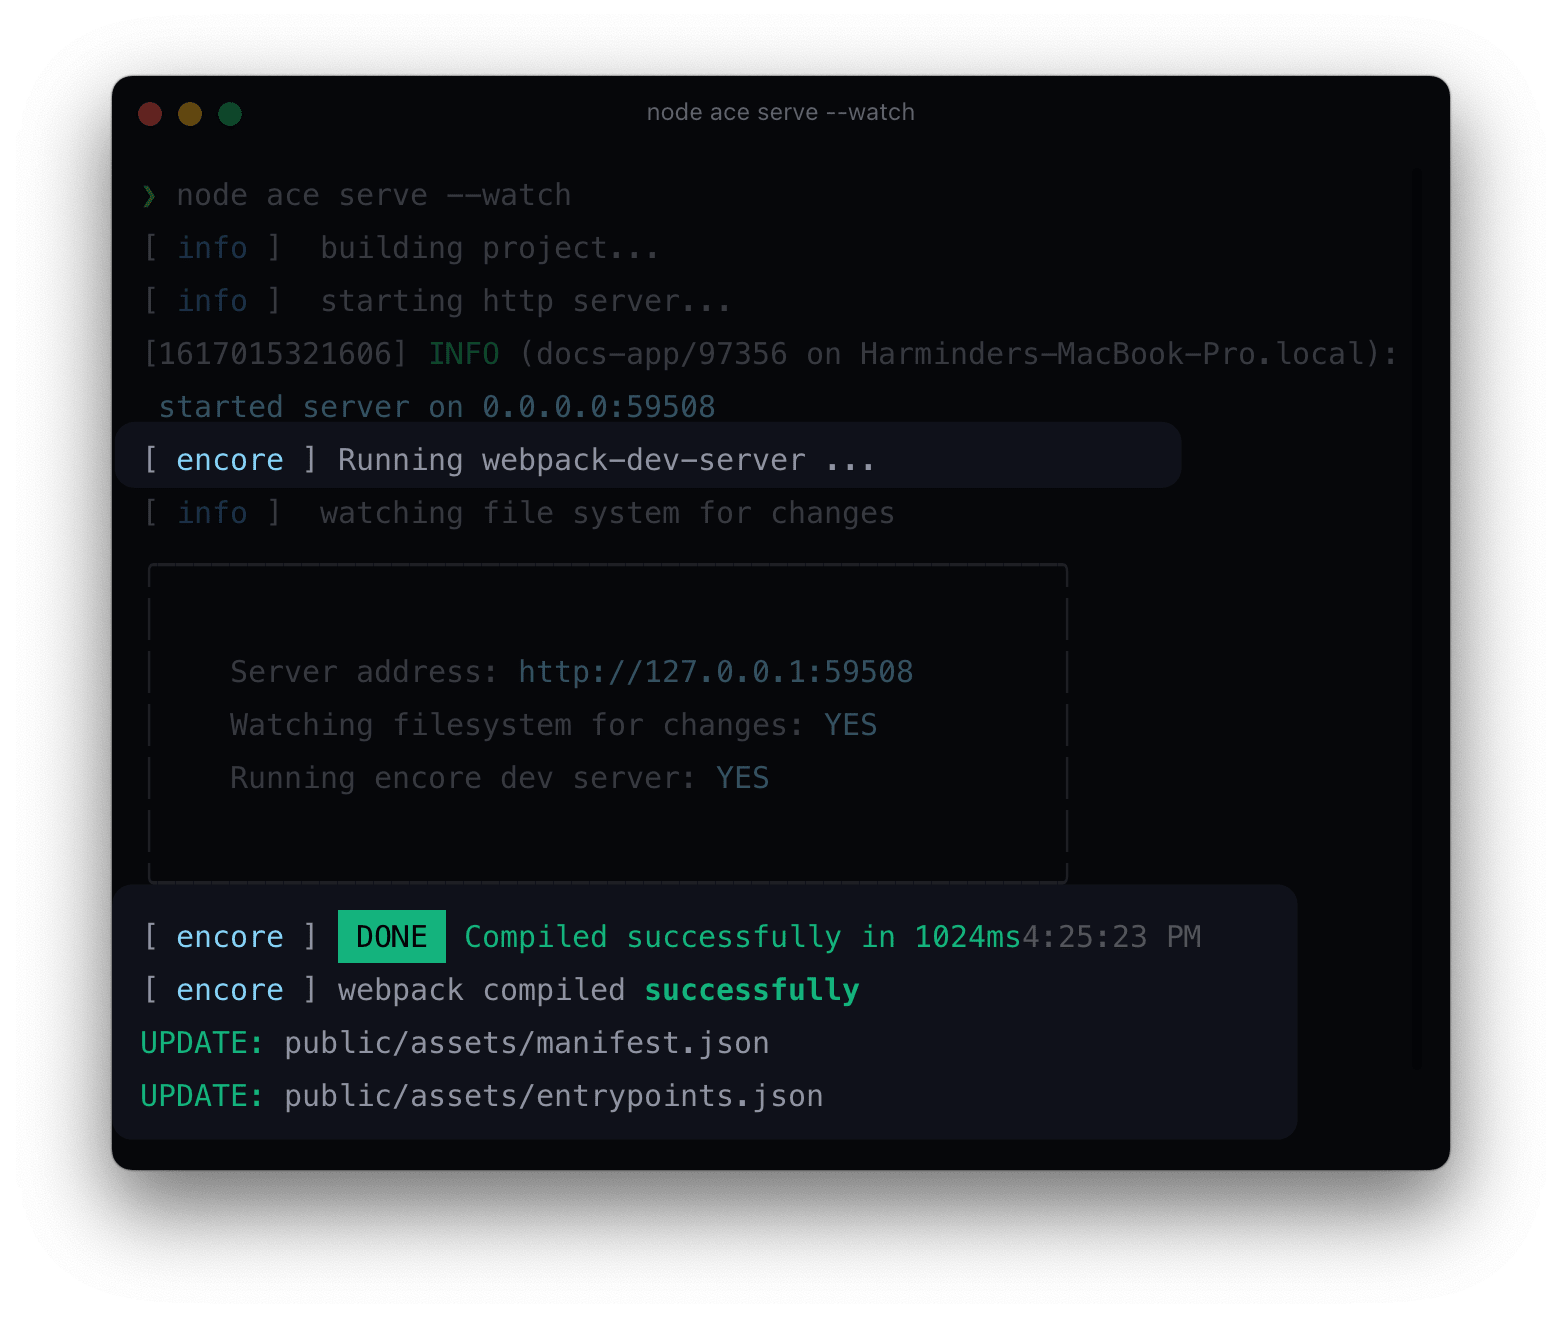
node ace serve --watch
The node ace serve --watch command will also run the Webpack dev server
within the same process to compile and serve the frontend assets.
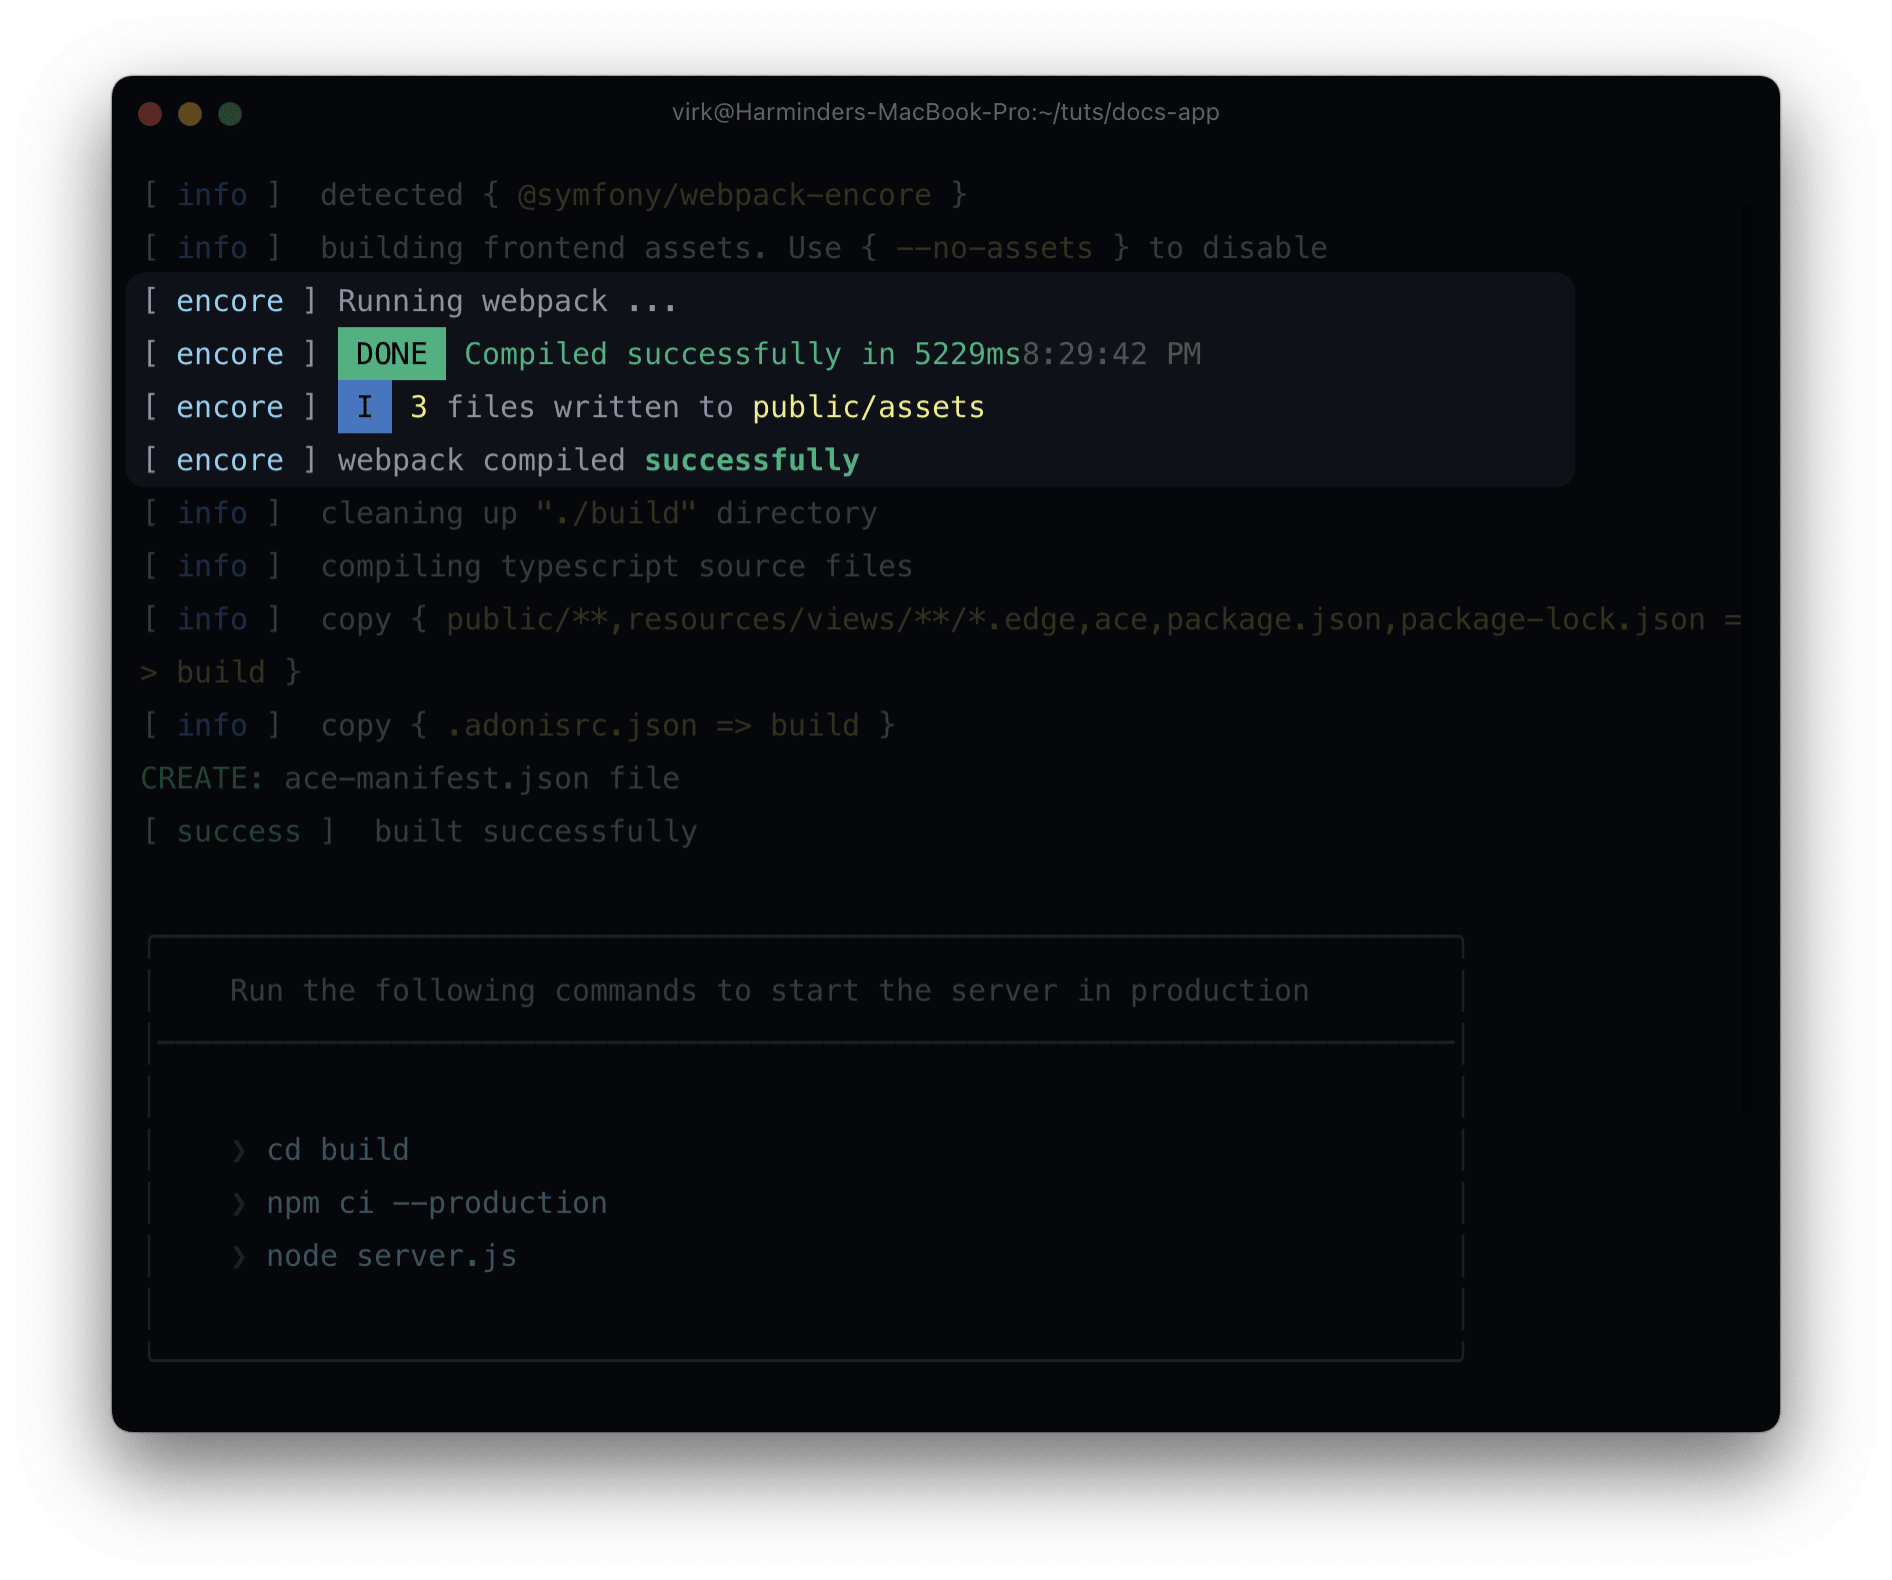
node ace build --production
Similarly, the node ace build --production command will also run the encore production command to bundle the frontend assets alongside your AdonisJS build.
Customizing output directory
By default, the compiled assets are written to the ./public/assets directory so that AdonisJS static file server can serve them.
However, you can customize and define any output directory by updating the webpack.config.js file.
The setOutputPath method accepts a path relative to the project root. Also, make sure to update the public URL prefix using the setPublicPath method.
// Write file to this directory
Encore.setOutputPath('./public/assets')

// Prefix the following to the output URL
Encore.setPublicPath('/assets')
Disable assets compilation
You can disable Webpack assets compilation by defining the --no-assets flag to the serve and the build commands.
node ace serve --watch --no-assets
node ace build --productions --no-assets
Customize dev server port and host
Webpack dev server runs on localhost:8080 by default. If the port is in use, AdonisJS will find a random port to start the Webpack dev server. However, you can also define a custom port using the --encore-args flag.
node ace serve --watch --encore-args="--port 5000"
As of now, you cannot define the port for the Webpack dev server inside the webpack.config.js file. This is the limitation enforced by the Symfony Encore package
.
Assets view helpers
Depending upon your Webpack config, the output files may not have the same name as the input file. For example, The Encore.enableVersioning() method appends the file hash to the output file name.
Hence, it is recommended to never hardcode the file names in your templates and always use the asset helper.
Do not reference files by name
<!DOCTYPE html>
<html lang="en">
<head>
  <script src="/assets/app.js"></script>
  <link rel="stylesheet" type="text/css" href="/assets/app.css">
</head>
<body>
</body>
</html>
Use the asset helper
<!DOCTYPE html>
<html lang="en">
<head>
  <script src="{{ asset('assets/app.js') }}"></script>
  <link rel="stylesheet" type="text/css" href="{{ asset('assets/app.css') }}">
</head>
<body>
</body>
</html>
The asset helper relies on the manifest.json file generated by the Encore to resolve the actual URL. You can use it for all the assets, including JavaScript, CSS, fonts, images, and so on.
Manifest file
Encore generates the manifest.json file inside the public/assets directory. This file contains a key-value pair of the file identifier and its URL.
{
  "assets/app.css": "http://localhost:8080/assets/app.css",
  "assets/app.js": "http://localhost:8080/assets/app.js"
}
The asset view helper resolves the URL from this file itself.
Entrypoints
Every Webpack bundle always has one or more entrypoints . Any other imports inside the entry point file are part of the same bundle.
For example, if you have registered the ./resources/js/app.js file as an entry point with the following contents, all the internal imports will be bundled together to form a single output.
import '../css/app.css'
import 'normalize.css'
import 'alpinejs'
You can define these entry points inside the webpack.config.js file using the Encore.addEntry method. The first argument is the entry point name, and 2nd is the path to the entry point file.
Encore.addEntry('app', './resources/js/app.js')
Multiple entry points
Most applications need a single entry point unless you are building multiple interfaces in a single codebase. For example: Creating a public website + an admin panel may require different entry points as they will usually have different frontend dependencies and styling altogether.
You can define multiple entry points by calling the Encore.addEntry method multiple times.
Reference entry points inside the template files
You can make use of the @entryPointStyles and the @entryPointScripts tags to render the script and the style tags for a given entry point.
The tags will output the HTML with the correct href and src attributes. The ./public/assets/entrypoints.json file is used to look up the URLs for a given entry point.
<!DOCTYPE html>
<html lang="en">
<head>
  @entryPointScripts('app')
  @entryPointStyles('app')
</head>
<body>
</body>
</html>
Setup PostCSS
The first step is to install the postcss-loader from the npm registry as follows:
npm i -D postcss-loader
Next, create the postcss.config.js file to configure PostCSS.
module.exports = {
  plugins: {}
}
And finally, enable the PostCSS loader inside the webpack.config.js file.
Encore.enablePostCssLoader()

// Pass options
Encore.enablePostCssLoader((options) => {
  options.postcssOptions = {
    config: path.resolve(__dirname, 'custom.config.js')
  }
})
Setup SASS, Less, and Stylus
To configure the CSS pre-processors, you must uncomment the following lines of code inside the webpack.config.js
// Enables SASS
Encore.enableSassLoader()

// Enables Less
Encore.enableLessLoader()

// Enables Stylus
Encore.enableStylusLoader()
Also, make sure to install the appropriate loaders for them.
# For SASS
npm i -D sass-loader sass

# For Less
npm i -D less-loader less

# For Stylus
npm i -D stylus-loader stylus
Copying & referencing images
Webpack cannot automatically scan/process the images referenced inside an Edge template. Hence, you have to tell the Webpack in advance to copy the images from a specific directory.
You can use the copyFiles method to copy the images to the build output.
Encore.copyFiles({
  from: './resources/images',
  to: 'images/[path][name].[hash:8].[ext]',
})
Also, make sure to use the asset helper to reference the image inside an img tag.
<img src="{{ asset('assets/images/logo.png') }}" />
Configuring Babel
Babel is pre-configured for all files with .js and .jsx extensions using babel-loader
.
You can further configure Babel using the Encore.configureBabel method.
Encore.configureBabel((babelConfig) => {
  babelConfig.plugins.push('styled-jsx/babel')
  babelConfig.presets.push('@babel/preset-flow')
}, {
  exclude: /node_modules/
})
Configuring browser targets
You can configure the browser targets for @babel/preset-env
inside the package.json.
{
  "browserslist": [
    "> 0.5%",
    "last 2 versions",
    "Firefox ESR",
    "not dead"
  ]
}
Using the .babelrc file
Instead of calling configureBabel(), you can also use the standard .babelrc file. However, this approach has a downside: as soon as a .babelrc file is present, Encore can longer configure babel for you, and the .babelrc file becomes the single source of truth.
Configuring React
You can configure React by installing React preset for Babel from the npm registry.
npm i -D @babel/preset-react
Next, enable the React preset inside the webpack.config.js file.
Encore.enableReactPreset()
If you are using the .babelrc file, you must enable the React preset inside it, as Encore can no longer configure Babel.
Configuring Vue
You can configure Vue by first enabling the Vue loader inside the webpack.config.js file.
Encore.enableVueLoader(() => {}, {
  version: 2
})
Encore.enableVueLoader(() => {}, {
  version: 3
})
Next, install the following required dependencies for Vue 2 or Vue 3.
npm i vue vue-loader @vue/compiler-sfc
npm i vue@next vue-loader@next @vue/compiler-sfc
You can define the vue-loader options
by passing a callback to the enableVueLoader method.
Encore.enableVueLoader((options) => {
  options.transformAssetUrls = {
    video: ['src', 'poster'],
    source: 'src',
    img: 'src',
    image: ['xlink:href', 'href'],
    use: ['xlink:href', 'href']
  }
})
The Encore-specific options can be defined as the third argument.
Encore.enableVueLoader(() => {}, {
  version: 3,
  runtimeCompilerBuild: false,
  useJsx: true
})
version
The VueJS version to use. You can opt between 2 and 3.
runtimeCompilerBuild
You must disable runtime compiler build when using single-file components and do not want to use the string-based templates.
useJsx
Enable/disable the support for JSX inside your Vue templates.
- You cannot enable the option with Vue3.
- Also, you need to install
@vue/babel-preset-jsxand@vue/babel-helper-vue-jsx-merge-propsdependencies when using JSX.
Adding custom Webpack loaders
Encore does a pretty good job in encapsulating the setup for the most common use cases. It also allows you to set up custom loaders using the addLoader method.
Encore
  .addLoader({
      test: /\.handlebars$/,
      loader: 'cson',
  })
Similarly, you can also add plugins using the addPlugin method.
const NpmInstallPlugin = require('npm-install-webpack-plugin')
Encore.addPlugin(new NpmInstallPlugin())