Mailer
You can send emails from your application using the Mailer module of AdonisJS. It is built on top of nodemailer with a few additions like previewing emails and the ability to trap emails during tests.
Before you can start sending emails, make sure to install and configure the package using the following instructions.
npm i @adonisjs/mail@8.2.1
node ace configure @adonisjs/mail

# CREATE: config/mail.ts
# CREATE: contracts/mail.ts
# UPDATE: .env,.env.example
# UPDATE: tsconfig.json { types += "@adonisjs/mail" }
# UPDATE: .adonisrc.json { commands += "@adonisjs/mail/build/commands" }
# UPDATE: .adonisrc.json { providers += "@adonisjs/mail" }
/**
 * Depending upon the mail driver you are using, you must validate
 * the environment variables required by it.
 *
 * Following is an example with Mailgun
 */
export default Env.rules({
  MAILGUN_API_KEY: Env.schema.string(),
  MAILGUN_DOMAIN: Env.schema.string(),
})
- Support for multiple drivers. SparkPost, SES, Mailgun and Smtp
- Ability to trap emails during tests
- Use Edge templates to define the email markup
- Preview emails on a dummy SMTP server
Config
The configuration for the mail package is stored inside the config/mail.ts file. Inside this file, you can define multiple mailers using the same or different drivers.
import { mailConfig } from '@adonisjs/mail/build/config'

export default mailConfig({
  mailer: 'mailgun',
  mailers: {
    mailgun: {
      driver: 'mailgun',
      baseUrl: 'https://api.mailgun.net/v3',
      key: Env.get('MAILGUN_API_KEY'),
      domain: Env.get('MAILGUN_DOMAIN'),
    },

    smtp: {
      driver: 'smtp',
      host: Env.get('SMTP_HOST') as string,
      port: Env.get('SMTP_PORT') as string,
    },
  },
})
mailer
The mailer property defines the default mailer to use for sending emails.
mailers
The mailers object defines a list of mailers you want to use. Each mailer must specify the driver it wants to use.
Mailgun options
The mailgun driver optionally accepts the following options.
| Config option | Mailgun variant |
|---|---|
oTags | o:tag |
oDeliverytime | o:deliverytime |
oTestMode | o:testmode |
oTracking | o:tracking |
oTrackingClick | o:tracking-clicks |
oTrackingOpens | o:tracking-opens |
oDkim | o:dkim |
headers | h:<header-name> |
You can pass all of the options except oDkim during the Mail.send call as well.
await Mail.use('mailgun').send((message) => {
  message.subject('Welcome Onboard!')
}, {
  oTags: ['signup'],
})
Sparkpost options
The sparkpost driver optionally accepts the following options.
| Config option | Sparkpost variant |
|---|---|
startTime | start_time |
openTracking | open_tracking |
clickTracking | click_tracking |
transactional | transactional |
sandbox | sandbox |
skipSuppression | skip_suppression |
ipPool | ip_pool |
You can also define all configuration options at runtime during the Mail.send call.
await Mail.use('sparkpost').send((message) => {
  message.subject('Welcome Onboard!')
}, {
  transaction: true,
  openTracking: false,
})
Smtp auth options
You can define the authentication options for the SMTP connections as follows:
{
  smtp: {
    driver: 'smtp',
    auth: {
      type: 'login'
      user: 'username'
      pass: 'password'
    }
  }
}

// Using Oauth2
{
  smtp: {
    driver: 'smtp',
    auth: {
      type: 'OAuth2',
      user: 'username',
      clientId: 'clientId',
      clientSecret: 'clientSecret',
      refreshToken?: 'refreshToken',
      accessToken?: 'accessToken',
      expires?: 3600,
      accessUrl?: 'accessUrl'
    }
  }
}
Configuring new mailers
You can also configure new mailers after the initial setup. Use the config stub as a reference to copy the default options for all the drivers.
Also, you must define the mailers inside the contracts/mail.ts file before you can define its config or use it to send emails. The contracts file is a way to inform the TypeScript static compiler about the existence of the mailer.
declare module '@ioc:Adonis/Addons/Mail' {
  import { MailDrivers } from '@ioc:Adonis/Addons/Mail'

  interface MailersList {
    smtp: MailDrivers['smtp'],
    ses: MailDrivers['ses'],
    mailgun: MailDrivers['mailgun'],
    sparkpost: MailDrivers['sparkpost'],
  }
}
The MailersList interface is a key-value pair of the mailer name and the driver it uses. The key can be anything. For example:
interface MailersList {
  transactional: MailDrivers['mailgun'],
  newsletter: MailDrivers['sparkpost'],
}
Usage
Once done with the setup, you can import the Mail module and send emails using the Mail.send method. It accepts a callback function to let you configure the outgoing message.
In the following example, the htmlView method accepts the path to an Edge template and the data you want to pass to it.
import Mail from '@ioc:Adonis/Addons/Mail'

class UsersController {
  public async store() {
    await Mail.send((message) => {
      message
        .from('info@example.com')
        .to('virk@adonisjs.com')
        .subject('Welcome Onboard!')
        .htmlView('emails/welcome', { name: 'Virk' })
    })
  }
}
Defer email sending
You can make use of the Mail.sendLater method to push the email to an in-memory queue. This ensures that the email is sent in the background and doesn't block the ongoing HTTP request. For example:
class UsersController {
  public async store() {
    // Pushed to in-memory queue
    await Mail.sendLater((message) => {
      message
        .from('info@example.com')
        .to('virk@adonisjs.com')
        .subject('Welcome Onboard!')
        .htmlView('emails/welcome', { name: 'Virk' })
    })
  }
}
Email templates
You can make use of standard Edge templates for defining the email content. The templates live inside the same resources/views directory. For better organization, you can move them inside a sub-directory called emails. For example:
node ace make:view emails/welcome

# ✔  create    resources/views/emails/welcome.edge
Open the newly created template file and paste the following contents inside it.
<h1> Welcome {{ user.fullName }} </h1>
<p>
  <a href="{{ url }}">Click here</a> to verify your email address.
</p>
Finally, you can reference the template as follows.
await Mail.sendLater((message) => {
  message.htmlView('emails/welcome', {
    user: { fullName: 'Some Name' },
    url: 'https://your-app.com/verification-url',
  })
})
You can also assign templates for the plain text and the apple watch content.
message.textView('emails/welcome.plain', {})
message.watchView('emails/welcome.watch', {})
Using MJML to create your template
Here's a screencast showing how to use MJML as your markup language for emails.
Attachments
You can send attachments using the message.attach method. It takes an absolute path to the file to attach.
import Mail from '@ioc:Adonis/Addons/Mail'
import Application from '@ioc:Adonis/Core/Application'

await Mail.sendLater((message) => {
  message.attach(Application.tmpPath('receipt.png'))
})
The file content type, encoding, and headers are derived from the filename. However, you can overwrite the defaults by explicitly defining them.
message.attach(
  Application.tmpPath('receipt.png'),
  {
    filename: `${transaction.id}.png`,
    contentDisposition: 'attachment',
    contentType: 'image/png',
  }
)
Streams and buffers as attachments
You can also send a Buffer or a stream directly as an attachment using the message.attachData method.
- Make sure to define the filename explicitly when passing a buffer or a stream.
- You cannot use the
attachDatamethod withMail.sendLateras streams and buffers cannot be serialized into queue jobs.
message.attachData(
  fs.createReadStream('file.txt'),
  {
    filename: 'file.txt'
  }
)
message.attachData(
  Buffer.from('hello world'),
  {
    filename: 'file.txt'
  }
)
Embedding images
There are multiple ways to render images inside the email body. One example is sending the image as an attachment and then adding it to the HTML using it's Content-Id (CID).
You can use the message.embed method and pass it the file's absolute path, along with a unique id as the second argument.
await Mail.sendLater((message) => {
  message.embed(
    Application.publicPath('receipt.png'),
    'a-unique-id-for-the-attachment',
  )
})
Inside the Edge template, you can use the earlier defined unique id as the img src.
<img src="cid:a-unique-id-for-the-attachment" />
Similar to the message.attachData
, you can also embed a Buffer or a stream directly using the embedData method.
You cannot use the embedData method with Mail.sendLater as streams and buffers cannot be serialized into queue jobs.
message.embedData(
  fs.createReadStream('file.txt'),
  'a-unique-id-for-the-attachment',
)
Calendar events
You can attach calendar events (.ics files) using the message.icalEvent method. The method accepts the invite content as a string or a callback to generate the content programmatically.
message.icalEvent(eventContent, {
  method: 'PUBLISH',
  filename: 'invite.ics',
})
Or generate the content using the calendar's fluent API. The calendar object passed to the callback is an instance of ICalCalendar
class from the ical-generator
package.
import { DateTime } from 'luxon'

message.icalEvent((calendar) => {
  calendar
    .createEvent({
      summary: 'Adding support for ALS',
      start: DateTime.local().plus({ minutes: 30 }),
      end: DateTime.local().plus({ minutes: 60 }),
    })
})
icalEventFromFile
You can attach a pre-existing .ics file using the message.icalEventFromFile method. The first argument is the absolute path to the file.
message.icalEventFromFile(
  Application.resourcesPath('calendar-invites/invite.ics'),
  {
    filename: 'invite.ics',
    method: 'PUBLISH'
  }
)
icalEventFromUrl
You can attach the event from a URL that returns the content for the invite.
message.icalEventFromUrl(
  'https://myapp.com/users/1/invite'
  {
    filename: 'invite.ics',
    method: 'PUBLISH'
  }
)
Messages API
Following is the list of available methods on the message object.
from
Define the sender of the email.
message.from('admin@example.com')

// Define name alongside the email
message.from('admin@example.com', 'Admin')
to
Define the recipient of the email. Calling this method multiple times will push a new recipient to the list. Similarly, you can call the cc and the bcc methods to add respect recipients.
message.to('foo@bar.com')

// Define name alongside the email
message.to('foo@bar.com', 'Mr foo')
subject
Define the subject for the email.
message.subject('Verify email address')
replyTo
An email address that will appear on the Reply-To: field. Calling this method multiple times will push a new replyTo recipient to the list.
message.replyTo('support@example.com')

// Define name alongside the email
message.replyTo('support@example.com', 'Support team')
messageId
Optional Message-Id value. We will generate a random value if not set.
message.messageId('Custom-message-id')
inReplyTo
The Message-ID this message is replying to
message.replyTo('some-existing-message-id')
references
An array of Message-IDs.
message.references(['id-1', 'id-2'])
envelope
Optionally define the SMTP envelope, if auto generated envelope is not suitable (see SMTP envelope for details)
message.envelope({
  from: '',
  to: '',
  cc: '',
  bcc: '',
})
priority
Sets message importance headers. Value must be either high, normal (default) or low.
message.priority('high')
encoding
Identifies encoding for text/html strings (defaults to utf-8, other values are hex and base64).
message.encoding('utf-8')
htmlView
Define the HTML body of the email by rendering an Edge template. Optionally, it accepts the data to pass to the template.
message.htmlView('emails/verify-email', { user: user })
You can use the textView method to define the email's plain-text body and the watchView method to specify the apple watch body.
html
Define the email HTML as a string directly. You must use either html or the htmlView method.
message.html(`<p> Welcome </p>`)
Use the text and the watch methods to define the email body from a raw string.
header
Define an email header.
message.header('X-Key-Name', 'X-Value')
preparedHeader
Nodemailer internally encodes and folds the headers to meet the requirement of having plain-ASCII messages with lines no longer than 78 bytes.
Sometimes it is preferable not to modify header values and pass these as provided. This can be achieved using the preparedHeader method.
message.preparedHeader('X-Key-Name', 'X-Value')
Switching mailers at runtime
You can use the Mail.use() method to switch between the mailers. The use method accepts the mailer name defined inside the config/mail.ts file under the mailers object.
await Mail.use('mailgun').sendLater(() => {
})

await Mail.use('smtp').sendLater(() => {
})
Mailer classes
Mailer classes allow you to extract the inline mail configuration to its dedicated class. The mailers are stored inside the app/Mailers directory, and you can create a new mailer by running the following Ace command.
node ace make:mailer VerifyEmail

# CREATE: app/Emails/VerifyEmail.ts
Every mailer class must extend the BaseMailer
to inherit the capabilities for sending an email. For the most part, you will be working inside the prepare method to configure the mail message.
import { BaseMailer, MessageContract } from '@ioc:Adonis/Addons/Mail'

export default class VerifyEmail extends BaseMailer {
  public prepare(message: MessageContract) {
    message
      .subject('The email subject')
      .from('admin@example.com')
      .to('user@example.com')
  }
}
Now, you can replace the inline Mail.send method call with the Mailer class.
import VerifyEmail from 'App/Mailers/VerifyEmail'

// Instantiate the class and send email
await new VerifyEmail().sendLater()
Passing data to the mailer
Mailer can accept data using the constructor arguments. For example:
export default class VerifyEmail extends BaseMailer {
  constructor (private user: User) {
    super()
  }

  public prepare(message: MessageContract) {
    message
      .subject('The email subject')
      .from('admin@example.com')
      .to(this.user.email)
  }
}
Here's how you can pass the user at the time of instantiating the class.
const user = await User.find(1)
await new VerifyEmail(user).sendLater()
Using a different mailer
The mailer classes use the default mailer configured inside the config/mail.ts file. However, you can use a different one by defining the following property on the class instance.
import Mail, { BaseMailer, MessageContract } from '@ioc:Adonis/Addons/Mail'

export default class VerifyEmail extends BaseMailer {
  public mailer = Mail.use('mailgun')

  public prepare(message: MessageContract) {
    message
      .subject('The email subject')
      .from('admin@example.com')
      .to('user@example.com')
  }
}
Customizing mailers directory
You can change the namespace for storing the mailers by defining the namespaces.mailers property inside the .adonisrc.json file. After the following change, the make:mailer Ace command will create new files inside the configured directory.
"namespaces": {
  "mailers": "App/Emails"
}
Mailer classes methods
The BaseMailer class exposes the following methods to send or preview the email.
// Send email
await new VerifyEmail().send()

// Send email by pushing it to in-memory queue
await new VerifyEmail().sendLater()

// Preview email using fake SMTP server
await new VerifyEmail().preview()
Preview emails
You can preview your emails by sending them to a fake SMTP server . This allows you to check if your email has any broken links or attachments before sending them to the actual users.
All you need to do is, replace the sendLater method with the preview method.
await Mail.preview((message) => {
  message
    .from('info@example.com')
    .to('virk@adonisjs.com')
    .subject('Welcome Onboard!')
    .htmlView('emails/welcome', { name: 'Virk' })
})
When using mailer classes, you can call the preview method directly on the class instance. Following is a demo of previewing emails via the Ace REPL.
Monitory mailer queue
The emails sent using the Mail.sendLater method are moved into an in-memory queue. You can monitor this queue using the Mail.monitorQueue method.
If you do not explicitly monitor the queue, the Mail module will log the errors using the logger .
You can write the following code inside a preload file .
import Mail from '@ioc:Adonis/Addons/Mail'

Mail.monitorQueue((error, result) => {
  if (error) {
    console.log('Unable to send email')
    console.log(error.mail)
    return
  }

  console.log('Email sent')
  console.log(result.mail)
  console.log(result.response)
})
Events
The mail module emits the mail:sent event to listen to observe the outgoing emails. You can place the code for the event listener inside a preload
file.
import Event from '@ioc:Adonis/Core/Event'

Event.on('mail:sent', ({ message, views, mailer, response }) => {
  console.log(message)
  console.log(views)
  console.log(mailer)
  console.log(response)
})
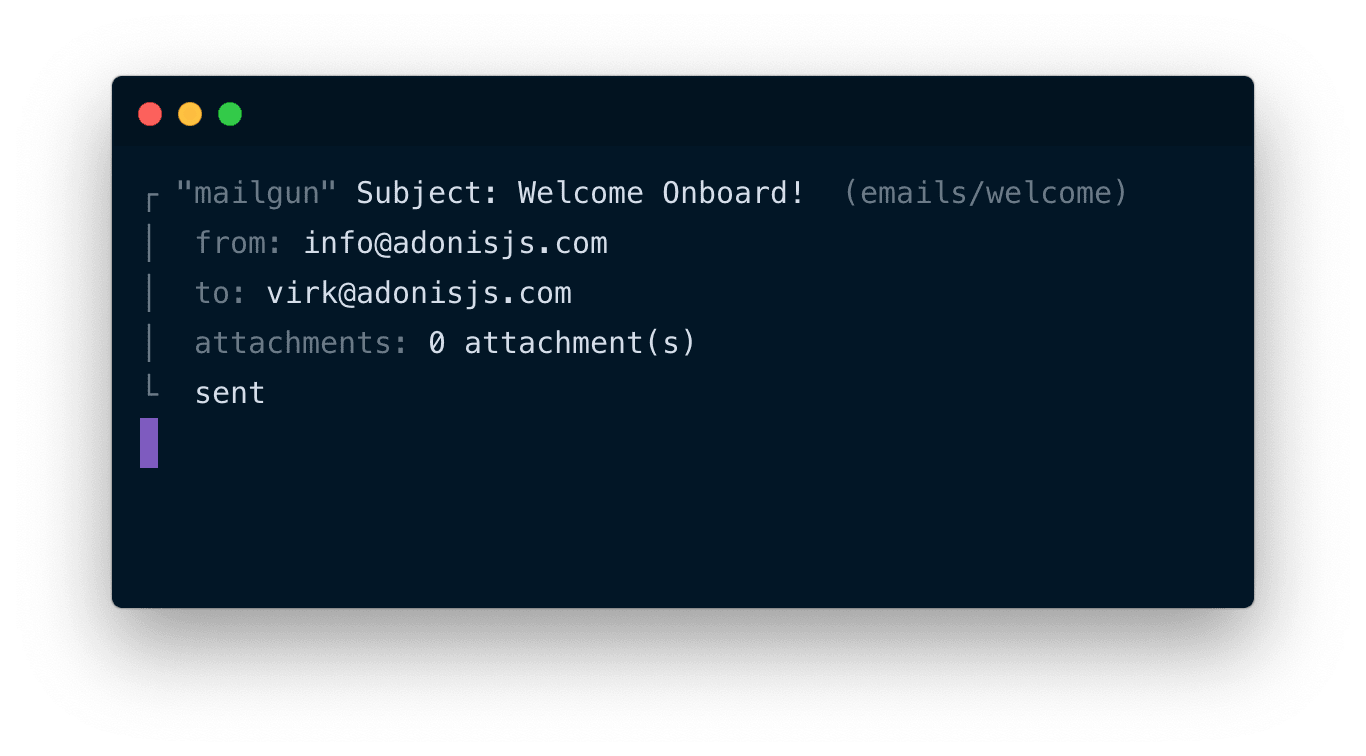
You can use the Mail.prettyPrint method to print the outgoing email on the terminal.
import Event from '@ioc:Adonis/Core/Event'
import Mail from '@ioc:Adonis/Addons/Mail'

Event.on('mail:sent', Mail.prettyPrint)
Creating a custom mail driver
The mail package exposes the API to add your custom drivers. Every driver must adhere to the MailDriverContract .
interface MailDriverContract {
  send(message: MessageNode, config?: any): Promise<any>
  close(): void | Promise<void>
}
send
The send method is responsible for sending the email. It receives the message object and optional runtime config (if your driver accepts it).
close
The close method should clean up any resources it has acquired. For example, The official SES driver closes the underlying nodemailer transport
Extending from outside in
Anytime you are extending the core of the framework. It is better to assume that you do not have access to the application code and its dependencies. In other words, write your extensions as if you are writing a third-party package and use dependency injection to rely on other dependencies.
For demonstration purposes, let's create a mail driver that wraps the existing nodemailer postmark transport.
mkdir providers/PostMarkDriver
touch providers/PostMarkDriver/index.ts
The directory structure will look as follows.
providers
└── PostMarkDriver
    └── index.ts
Open the PostMarkDriver/index.ts file and paste the following contents inside it.
Make sure to install the nodemailer and the nodemailer-postmark-transport dependencies as well.
import nodemailer from 'nodemailer'
import postMarkTransport from 'nodemailer-postmark-transport'
import { MailDriverContract, MessageNode } from '@ioc:Adonis/Addons/Mail'

/**
 * Config accepted by the driver
 */
export type PostMarkConfig = {
  driver: 'postmark',
  auth: {
    apiKey: string
  }
}

export class PostMarkDriver implements MailDriverContract {
  private transporter: any

  constructor(private config: PostMarkConfig) {
    /**
     * Instantiate the nodemailer transport
     */
    this.transporter = nodemailer.createTransport(
      postMarkTransport(this.config)
    )
  }

  /**
   * Send email using the underlying transport
   */
  public async send(message: MessageNode) {
    return this.transporter.sendMail(message)
  }

  /**
   * Cleanup resources
   */
  public close() {
    this.transporter.close()
    this.transporter = null
  }
}
Next, you must register the driver with the Mail module of AdonisJS. You must do it inside the boot method of a service provider. Open the pre-existing providers/AppProvider.ts file and paste the following code inside it.
import { ApplicationContract } from '@ioc:Adonis/Core/Application'

export default class AppProvider {
  constructor(protected app: ApplicationContract) {}

  public async boot() {
    const { PostMarkDriver } = await import('./PostMarkDriver')
    const Mail = this.app.container.use('Adonis/Addons/Mail')

    Mail.extend('postmark', (_mail, _mapping, config) => {
      return new PostMarkDriver(config)
    })
  }
}
Driver lifecycle
The mail module internally creates a single instance of the driver and uses it throughout the application's lifecycle unless someone decides to close it manually.
Informing TypeScript about the new driver
Before someone can reference this driver within the config/mail.ts file. You will have to inform TypeScript static compiler about its existence.
If you are creating a package, then you can write the following code inside your package main file, otherwise you can write it inside the contracts/mail.ts file.
import { PostMarkConfig } from '../providers/PostMarkDriver'

declare module '@ioc:Adonis/Addons/Mail' {
  interface MailDrivers {
    postmark: {
      config: PostMarkConfig,
      implementation: MailDriverContract
    }
  }
}
Using the driver
Alright, we are now ready to use the postmark driver. Let's start by defining the config for a new mailer inside the config/mail.ts file.
{
  mailers: {
    transactionalMailer: {
      driver: 'postmark',
      auth: {
        apiKey: 'your-api-key',
      }
    }
  }
}
And use it as follows:
import Mail from '@ioc:Adonis/Core/Mail'

Mail.use('transactionalMailer').send((message) => {
})