Social authentication
Along with the standard authentication, AdonisJS also ships with a package to help you implement social authentication with OAuth providers like Google, Twitter, GitHub, and so on.
npm i @adonisjs/ally@4.1.5
node ace configure @adonisjs/ally

# CREATE: contracts/ally.ts
# CREATE: config/ally.ts
# UPDATE: .env,.env.example
# UPDATE: tsconfig.json { types += "@adonisjs/ally" }
# UPDATE: .adonisrc.json { providers += "@adonisjs/ally" }
/**
 * Make sure to validate the environment variables required
 * by the configured social drivers.
 *
 * Following is an example of validating the env vars for
 * the Google provider
 */

export default Env.rules({
  // Other validation rules
  GOOGLE_CLIENT_ID: Env.schema.string(),
  GOOGLE_CLIENT_SECRET: Env.schema.string(),
})
- Support for multiple providers. Google, Twitter, LinkedIn, Facebook, Discord, Spotify, and GitHub
- Extensible API to add custom social providers
Config
The configuration for the social providers is stored inside the config/ally.ts file. You can define one or more providers using the same or a different underlying driver.
const allyConfig: AllyConfig = {
  github: {
    driver: 'github',
    clientId: Env.get('GITHUB_CLIENT_ID'),
    clientSecret: Env.get('GITHUB_CLIENT_SECRET'),
    callbackUrl: 'http://localhost:3333/github',
  },
  twitter: {
    driver: 'twitter',
    clientId: Env.get('TWITTER_CLIENT_ID'),
    clientSecret: Env.get('TWITTER_CLIENT_SECRET'),
    callbackUrl: 'http://localhost:3333/twitter',
  },
}

export default allyConfig
driver
Name of the driver to use. It must always be one of the following available drivers.
googletwittergithubdiscordfacebooklinkedinspotify
clientId
The OAuth provider's client id. You must keep it securely inside the environment variables.
clientSecret
The OAuth provider's client secret. You must keep it securely inside the environment variables.
callbackUrl
The callback URL to handle the post redirect response from the OAuth provider. You must register the same URL with the OAuth provider as well.
Configuring new providers
You can also configure new providers after the initial setup. The first step is to register them inside the contracts/ally.ts file under the SocialProviders interface.
declare module '@ioc:Adonis/Addons/Ally' {
  interface SocialProviders {
    github: {
      config: GithubDriverConfig
      implementation: GithubDriverContract
    }
    twitter: {
      config: TwitterDriverConfig
      implementation: TwitterDriverContract
    }
  }
}
Once you have added the new provider inside the contracts file, the TypeScript compiler will automatically validate the config file, forcing you to define the configuration for it as well.
Authenticate requests
After the setup process, you can access the ally object inside your route handlers using the ctx.ally property and redirect the user to the OAuth provider website.
Route.get('/github/redirect', async ({ ally }) => {
  return ally.use('github').redirect()
})
Handling the callback request
Once the user decides to approve/disapprove the login request, the OAuth provider will redirect the user back to the callbackUrl.
Inside this route, you must handle all the use cases for the failure state before accessing the user.
Route.get('/github/callback', async ({ ally }) => {
  const github = ally.use('github')

  /**
   * User has explicitly denied the login request
   */
  if (github.accessDenied()) {
    return 'Access was denied'
  }

  /**
   * Unable to verify the CSRF state
   */
  if (github.stateMisMatch()) {
    return 'Request expired. Retry again'
  }

  /**
   * There was an unknown error during the redirect
   */
  if (github.hasError()) {
    return github.getError()
  }

  /**
   * Finally, access the user
   */
  const user = await github.user()
})
Marking user as logged in
Ally decouples itself from the Authentication flow used by your application. Its only job is to manage the lifecycle of an OAuth request and give you the user details shared by the OAuth provider.
Once you have the user details, you can decide how to store them and authenticate the user in your application. For example: After the GitHub login, you may create a new user account and then create a session using the web authentication guard . For example:
import User from 'App/Models/User'
import Route from '@ioc:Adonis/Core/Route'

Route.get('/github/callback', async ({ ally, auth }) => {
  const github = ally.use('github')

  /**
   * Managing error states here
   */

  const githubUser = await github.user()

  /**
   * Find the user by email or create
   * a new one
   */
  const user = await User.firstOrCreate({
    email: githubUser.email,
  }, {
    name: githubUser.name,
    accessToken: githubUser.token.token,
    isVerified: githubUser.emailVerificationState === 'verified'
  })

  /**
   * Login user using the web guard
   */
  await auth.use('web').login(user)
})
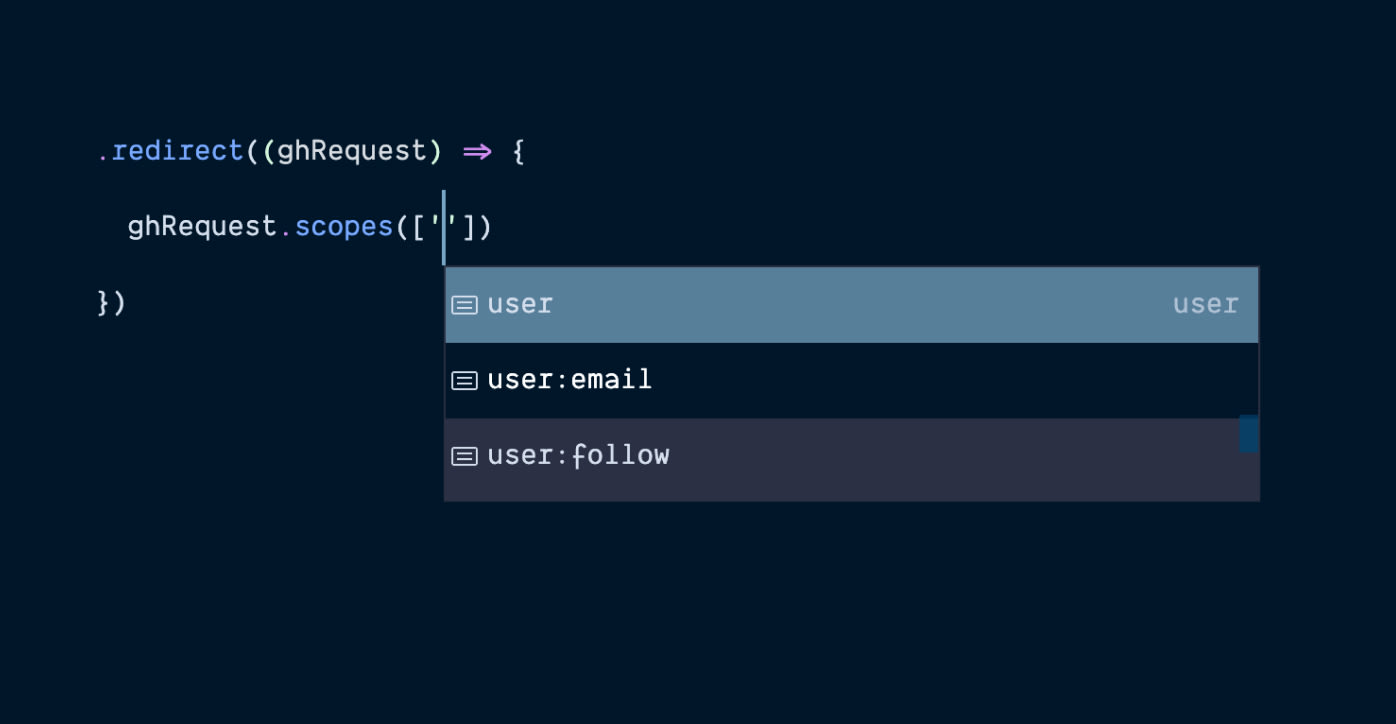
Define scopes
You can define the OAuth scopes by passing a callback to the redirect method. The callback receives the redirect request as the first parameter, and you can define scopes using the redirectRequest.scopes method.
You can also configure the same set of scopes inside the config/ally.ts file, and we will use them on all the redirect requests.
{
  github: {
    driver: 'github',
    // ... rest of the config
    scopes: ['user:email']
  }
}
Route.get('/github/redirect', async ({ ally }) => {
  return ally
    .use('github')
    .redirect((redirectRequest) => {
      redirectRequest.scopes(['gist', 'user'])
    })
})
The scopes will vary based upon the underlying OAuth provider. However, you can rely on the TypeScript IntelliSense to list all the available options for you.
Also, for some of the drivers (e.g., Google), the list of the scopes is too long, and hence we do not provide IntelliSense for all of them, and you must consult the OAuth provider documentation.
If you want to customize the Discord driver, it require to have the identify scope present to work properly.
You can find more information about it here
.
Define other query string params
You can also define custom query string params on the redirect request using the redirectRequest.param method. For example: Define the prompt and the access_type for the Google provider.
Route.get('/google/redirect', async ({ ally }) => {
  return ally
    .use('google')
    .redirect((redirectRequest) => {
      redirectRequest
        .param('access_type', 'offline')
        .param('prompt', 'select_account')
    })
})
User properties
Following is the list of user properties returned by the ally.user method. The properties are consistent among all the underlying drivers, and you can access the original response using the user.original property.
const user = await ally.use('github').user()

console.log(user.id)
console.log(user.email)
// and so on
id
A unique id returned by the OAuth provider.
nickName
The nickName property refers to the publicly visible name for the OAuth provider. The value of the name property is used when there is no different nickname.
name
The name of the user returned in the OAuth provider response.
The associated email address of the user.
emailVerificationState
Find if the user's email address is verified with the OAuth provider or not. The state is always one of the following.
verifiedrepresents that the email is verified.unverifiedrepresent that the email is not verified with the OAuth provider.unsupportedmeans the OAuth provider does not share if the email is verified or not. For example, Twitter does not share the verification status of an email.
avatarUrl
The HTTP(s) URL to the user's public profile picture.
token
The token property is the reference to the underlying access token object. The token object has the following sub-properties.
| Property | Protocol | Description |
|---|---|---|
token | Oauth2 and Oauth1 | The value of the access token |
secret | Oauth1 | The token secret. Currently, Twitter is the only provider using the Oauth1.0 |
type | Oauth2 | The type of token. |
refreshToken | Oauth2 | Only exists if the underlying provider supports refresh tokens. |
expiresAt | Oauth2 | An instance of the luxon DateTime class representing the absolute time when the access token will expire. |
expiresIn | Oauth2 | Value in seconds after which the token will expire. It is a static value and not change as time passes by |
original
Reference to the original response from the OAuth provider.
const githubUser = await github.user()
console.log(githubUser.original)
Get user from token
You can retrieve the user details from a pre-existing access token using the ally.userFromToken method.
Route.get('/github/user', async ({ ally }) => {
  const user = await ally
    .use('github')
    .userFromToken(accessToken)
})
For an OAuth1 driver (i.e., Twitter), you can get the user details using the token and the secret values.
Route.get('/twitter/user', async ({ ally }) => {
  const user = await ally
    .use('twitter')
    .userFromTokenAndSecret(token, secret)
})
Stateless authentication
The lifecycle of an OAuth request (redirect + callback) is stateful, as it stores a CSRF token inside cookies. However, you can disable the CSRF verification by calling the stateless method.
Route.get('/github/redirect', async ({ ally }) => {
  return ally.use('github').stateless().redirect()
})
Also, make sure to disable the CSRF verification at the time of retrieving the user.
Route.get('/github/callback', async ({ ally }) => {
  const github = ally.use('github').stateless()

  const user = await github.user()
})
Other methods/properties
Following is the list of other available methods and properties.
redirectUrl
The redirectUrl method returns the redirect URL as a string. We will define no state if you decide to perform a redirect manually by fetching the redirect URL first.
const url = await ally.use('github').redirectUrl()
accessToken
Returns the access token by exchanging the post redirect code with the OAuth provider. The user method all contains the access token, so there is no need to fetch it separately.
const token = await ally.use('github').accessToken()
hasCode
Find if the redirect request has the authorization code.
if(ally.use('github').hasCode()) {
}
getCode
Returns the authorization code.
if(ally.use('github').hasCode()) {
  console.log(ally.use('github').getCode())
}
Config reference
Following is the list of available configuration options for all the officially available drivers.
GitHub
github: {
  driver: 'github',
  clientId: '',
  clientSecret: '',
  callbackUrl: '',

  // GitHub specific
  login: 'adonisjs',
  scopes: ['user', 'gist'],
  allowSignup: true,
}
google: {
  driver: 'google',
  clientId: '',
  clientSecret: '',
  callbackUrl: '',

  // Google specific
  prompt: 'select_account',
  accessType: 'offline',
  hostedDomain: 'adonisjs.com',
  display: 'page',
  scopes: ['userinfo.email', 'calendar.events'],
}
twitter: {
  driver: 'twitter',
  clientId: '',
  clientSecret: '',
  callbackUrl: '',
}
Discord
discord: {
  driver: 'discord',
  clientId: '',
  clientSecret: '',
  callbackUrl: '',

  // Discord specific
  prompt: 'consent' | 'none',
  guildId: '',
  disableGuildSelect: false,
  permissions: 10,
  // identify scope is always required
  scopes: ['identify', 'email'],
}
linkedin: {
  driver: 'linkedin',
  clientId: '',
  clientSecret: '',
  callbackUrl: '',

  // LinkedIn specific
  scopes: ['r_emailaddress', 'r_liteprofile'],
}
facebook: {
  driver: 'facebook',
  clientId: '',
  clientSecret: '',
  callbackUrl: '',

  // Facebook specific
  scopes: ['email', 'user_photos'],
  userFields: ['first_name', 'picture', 'email'],
  display: '',
  authType: '',
}
Spotify
spotify: {
  driver: 'spotify',
  clientId: '',
  clientSecret: '',
  callbackUrl: '',

  // Spotify specific
  scopes: ['user-read-email', 'streaming'],
  showDialog: false
}
Adding custom drivers
Ally is extensible and allows you to add your own custom drivers as well. We have created a boilerplate repo to help you create a custom driver from scratch and publish it as a package on npm.